# HOW TO LAUNCH A TOKEN ON SOLAUNCHER
Anyone can launch a meme coin on Solana using [**https://solauncher.org**](https://solauncher.org/) and can get their token trading on [**Raydium.io**](https://raydium.io/swap/) within minutes. Below is a step-by-step guide to help you through the process:
**Step 1: Access Solauncher.org**
Visit the **Solauncher.org** website and ensure you are connected to the Solana network using a compatible wallet like Phantom or Sollet.
**Step 2: Create Your Token**
1. On Solauncher.org, navigate to the token creation section.
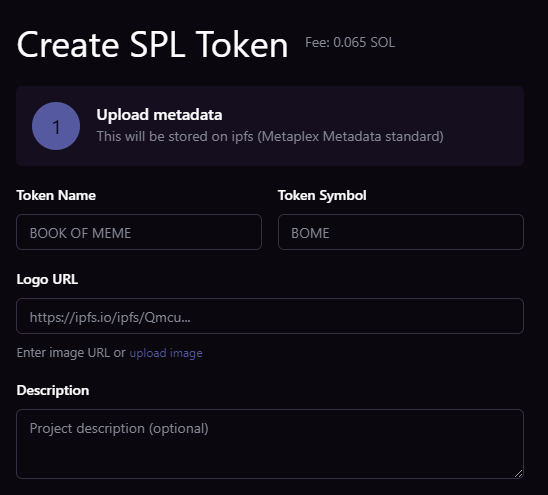
2. Fill out the necessary details for your meme coin, including:
* Token name
* Token symbol
* Token logo (upload an image representing your meme coin)
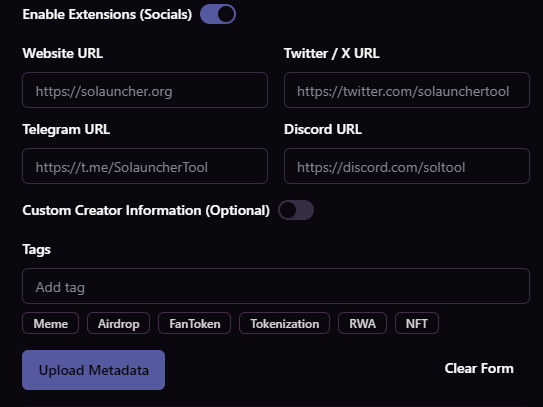
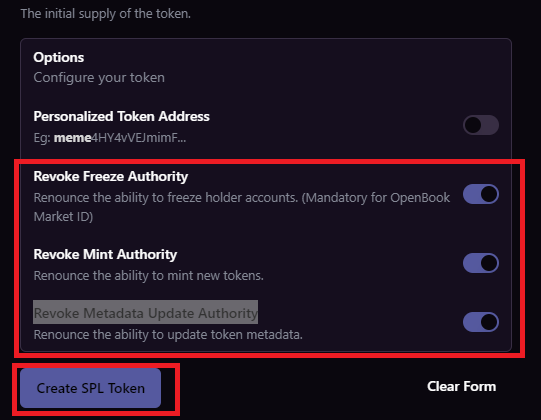
**Note:** There’s an option to enable metadata Extensions for Token website and social media URLs. Click on **“Upload Metadata”.** After Metadata is uploaded successfully, enter **token decimal** and **token supply**. Next is to click on **“Revoke Freeze Authority”**, **“Revoke Mint Authority”** and **“Revoke Metadata Update Authority”** before clicking on **“Create SPL Token”** button.
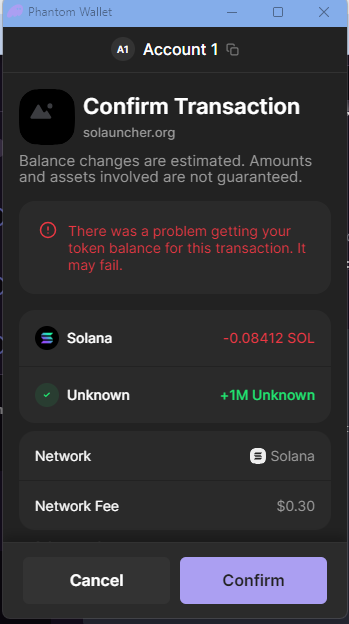
Next step is to sign the transaction in your wallet.
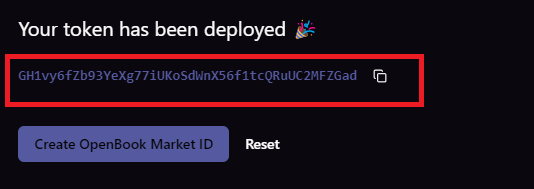
Your Token address will be displayed on the page after your transaction is confirmed.
Now click on **“Create OpenBook Market ID”** to create your Market ID.
A Video On How To Create a Token on Solauncher.org
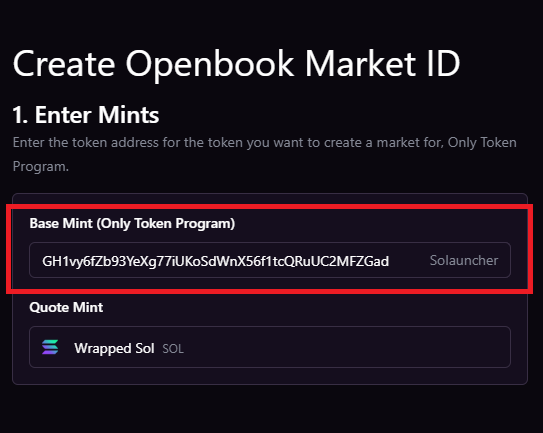
**Step 3: Create an OpenBook Market ID**
Proceed to create an OpenBook Market ID for your token on **Solauncher.org**. This will enable users to trade your token on Raydium and OpenBook Orderbook Exchange.
Start by pasting your **Base Mint** address, which is your token address into the space provided.
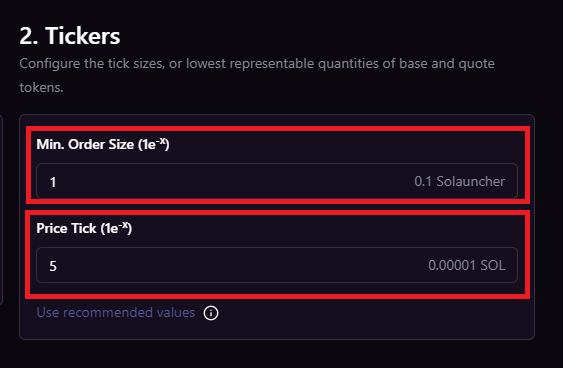
This will automatically generate the correct **Min. Order Size** and **Price Tick** for your Token. I recommend that you don’t change the inputs in other not to encounter any error during the Market creation process.
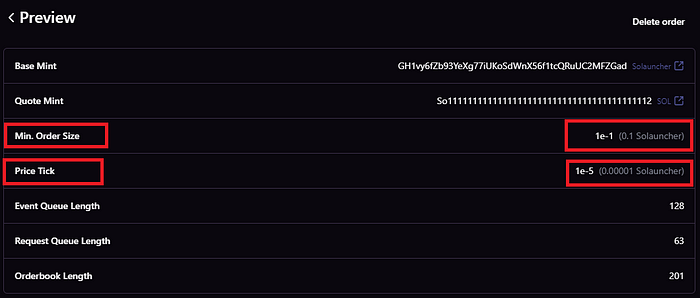
There’s an option to select **“Only Raydium”** or “**Openbook + Raydium”,** you can choose choose to leave it on **“Only Raydium”** before proceeding to click on **Preview to** view your settings.
In the above example, entering 1 for your Min Order Size will set your Min Order Size to **0.1**, meaning you can make an order up to 1 decimal point. Also entering 5 for Price Tick will set the Price Tick to **0.00001** meaning your token will have only 5 decimal points. Note: Never change the inputs suggested by the tool unless you know what you’re doing.
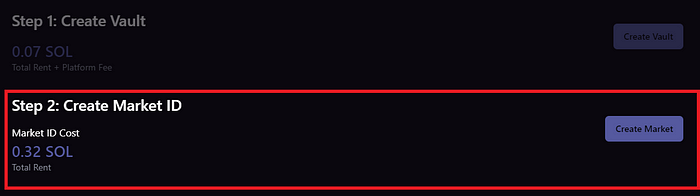
Next is to Create Vault, which cost **0.07 SOL.**
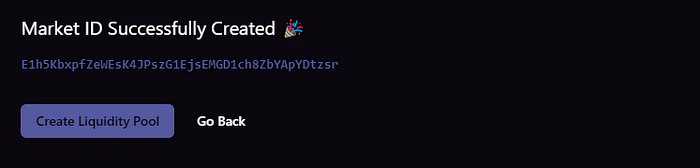
Now you can create the market id by clicking on **Create Market.**
Copy the Market ID and head over to Create Pool to create a liquidity Pool on Raydium.
**Step 4: Set Up a Raydium Liquidity Pool and add initial Liquidity**
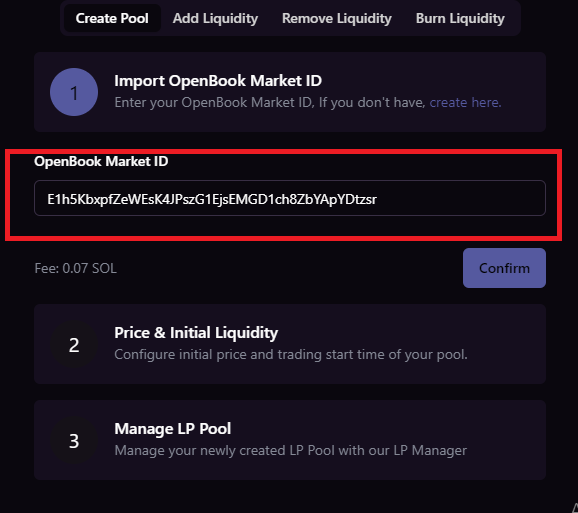
Create a Raydium liquidity pool for your token and specify the initial liquidity amount and other parameters as needed by visiting the Create Pool Page.
Paste your Openbook ID in the space provided and click on the **“Confirm”** button and wait for it to load.
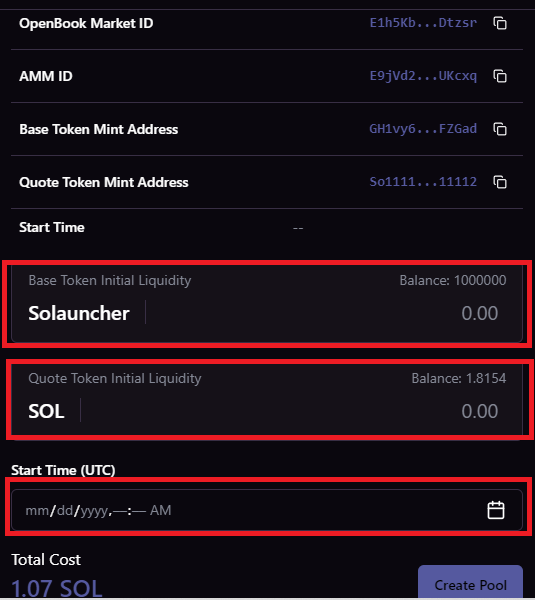
Now enter the amount of Tokens you want to pair with Sol. Usually you would like to pair your tokens with **4 SOL** and above. Enter the start time after setting the amount of your tokens you want to pair with SOL.
Click on **“Create Pool”** button, confirm the transaction and wait for the pool to be created.
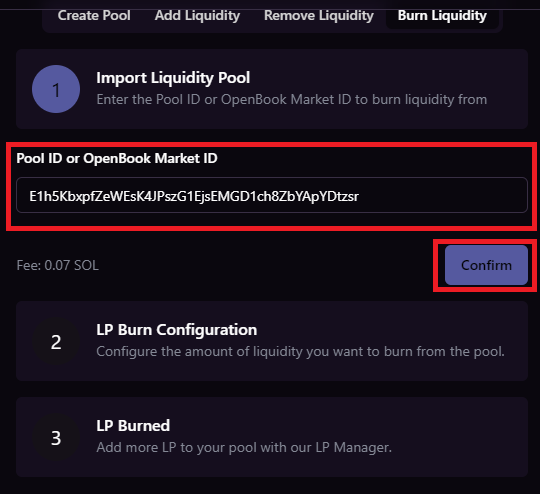
**Step 5: Burn Liquidity Pool Tokens**
On Solana, projects usually burn their LP tokens to gain community trust and allow their tokens to be traded freely. To burn your lp tokens, visit **** and paste your Pool ID or Openbook Market ID before clicking on **“Confirm”** to load it.
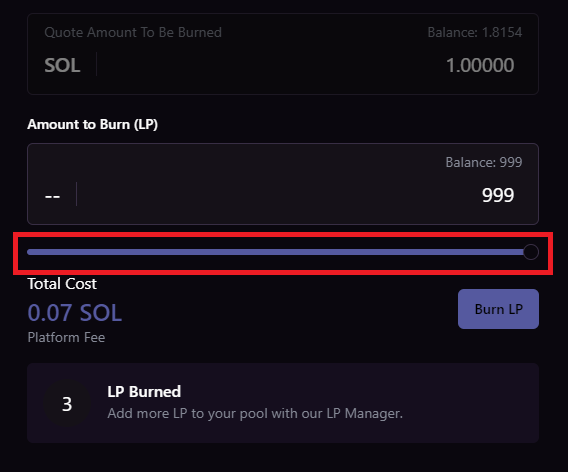
Now slide to determine the amount of LP tokens you want to burn and click on the **Burn LP** button.
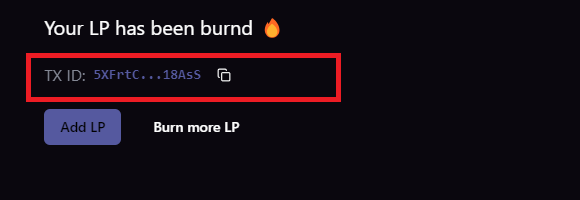
Sign the transaction to complete the LP burn process. The message below will be displayed after the burn is complete.
Click on the **TX ID** to open transaction on TX on **Solscan.io**
Your token will be available for trading on Raydium after going through the above process. Additionally, you can list your token on various token aggregators for increased visibility. Here’s how:
1. Automatic Listing: Your token will be automatically listed on platforms like [Birdeye](https://birdeye.so/) and [Dexscreener](https://dexscreener.com/) after creating the liquidity pool.
2. Apply for Listing: Apply for listing on larger platforms like [CoinGecko](https://www.coingecko.com/) and [CoinMarketCap](https://coinmarketcap.com/) to reach a broader audience.
3. Follow the application processes for each platform, providing necessary details about your token and project.
4. Optional Verification: Consider applying for verification on prominent Solana platforms like Jupiter Aggregator for increased credibility and accessibility.
---
# Agent Instructions: Querying This Documentation
If you need additional information that is not directly available in this page, you can query the documentation dynamically by asking a question.
Perform an HTTP GET request on the current page URL with the `ask` query parameter:
```
GET https://docs.solauncher.org/legacy-dapp-tutorial-old/how-to-launch-a-token-on-solauncher.md?ask=
```
The question should be specific, self-contained, and written in natural language.
The response will contain a direct answer to the question and relevant excerpts and sources from the documentation.
Use this mechanism when the answer is not explicitly present in the current page, you need clarification or additional context, or you want to retrieve related documentation sections.